Using the Path Tool
You can use the Path tool to draw curves on an image.
Measurements of length, perimeter, and area can be shown with the annotation in 2D
Additional options available for the Path tool include profiling the intensity values along its length (see Profiling Intensity).
Whenever you create a path with the Path tool, control points are added along the path automatically as you drag to create the required curve. Dragonfly will automatically compute a Catmull-Rom spline to link the points that define the curve. You should note that Catmull-Rom splines are a family of cubic interpolating splines formulated such that the tangent at each point is calculated using the previous and next point on the spline.
- Maximize the 2D in which you plan to create the path, recommended.
- Click the Path
 tool in the Annotate panel.
 - Click and then drag to create the path.
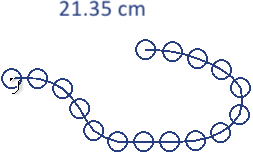
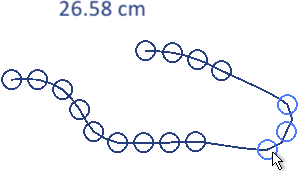
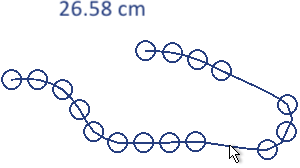
The length of the path is indicated at its starting point and in the bottom section of the Data Properties and Settings panel.
A number of editing options are available for paths. You can adjust the position of the control points that define the path, add additional control points, and extend the length of a path. You can also smooth and resample paths (see Path Properties).
You can adjust a path by repositioning one or more of its control points.
- Select the required path, either directly in the 2D view or in the top section of the Data Properties and Settings panel.
- Click inside the control point or points you need to adjust and then drag.
The path measurements are updated automatically.
- Click inside the selected control point(s) to de-select.
- Select the required path, either directly in the 2D view or in the top section of the Data Properties and Settings panel.
- Select any section of the path between its control points and then drag to reposition the annotation.
- Select the required path, either directly in the 2D view or in the top section of the Data Properties and Settings panel.
- Do the following, as required:
- Hold down Left Shift and then double-click the path between control points to add a control point.
- Hold down Left Shift and then double-click a control point to remove it from the path.
- Click the Path tool in the Annotate panel.
- Select the required path, either directly in the 2D view or in the top section of the Data Properties and Settings panel.
- Hold down Left Ctrl (or your configured key) and then click and drag one of the path end points.
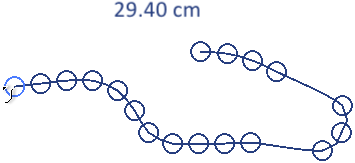
The path measurements are updated automatically.
- Click inside the selected control point to de-select it.
You can customize the appearance of paths and their captions in the Properties box, shown below.
Path properties
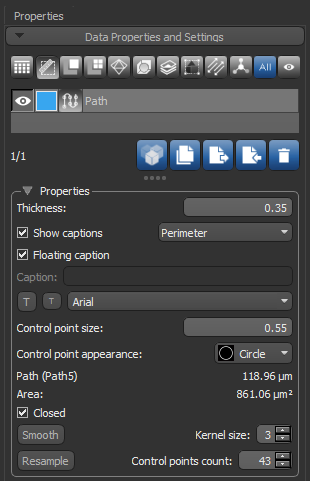
| Description | |
|---|---|
| Thickness | Indicates the thickness (in screen percentage) of the contour that defines the shape of the annotation, including its control points.
|
| Show captions | If selected, a caption will appear with the annotation. Options include:
Length… If selected, the length of the path will be shown as the caption. Perimeter… If selected, the perimeter of the path will be shown. Requires that the path is closed. Area… If selected, the area within the perimeter of the path will be shown. Requires that the path is closed. Custom… If selected, the caption entered in the Caption edit box will be shown. |
| Floating caption | If selected, the caption will appear in a floating box that can be repositioned manually anywhere within the view to avoid overlapping. |
| Font size and style | Lets you increase or decrease the font size of the caption with the Increase font size and Decease font size buttons, as well as choose a font style. |
| Control point size | Lets you set the size (in screen percentage) of the annotation's control points.
|
| Control point appearance | Lets you choose a shape — circle, square, triangle, cross, or 'X' — for the annotation's control points. |
| Path | Indicates the length of the selected path, or its perimeter if the path is closed. |
| Area | For closed paths, indicates the precise area inside the contour line that defines the region. You should note that Dragonfly calculates sub-pixels* for area measurements. |
| Closed | If checked, the path will be closed and the perimeter and area will be computed automatically. |
| Smooth | Lets you to smooth curves by a selected magnitude.
|
| Resample | Lets you to reduce or increase the number of control points that define the path.
|
The following tools are available for plotting and profiling intensity values along the length of paths.
| Description | ||
|---|---|---|
| Profile |
|
Lets you profile intensity values along the length of the path (see Profiling Intensity). |
A number of configured actions and keyboard shortcuts are available for creating and editing paths. The default settings for these actions are listed in the following table.
| Action | Key | Mouse |
|---|---|---|
| Create a path in Path mode | - | Left mouse |
| Edit a path in Path mode | - | Left mouse |
| Add or remove control points from paths and regions | Left Shift | Double-click |
| Extend a path with the Path tool | Left Ctrl | Left mouse |
| Switch to extend path mode | Left Ctrl | Left mouse |
| Switch to Path mode | - | - |
